-Their turn, to build their toys.-

Star Wars Figurines

After so many years building, sewing, painting, carving, tinkling toys and games for my children, they now do it themselves! The rule under our roof is; -start with what you have-. Having enough bits of timber in the shed, my son (11) decided to cut out some lightsabers for himself, his sister and his friends! I let you imagine the number of sabre fight we had at our house, at the park, in the bush, at the beach… in only a few weeks.

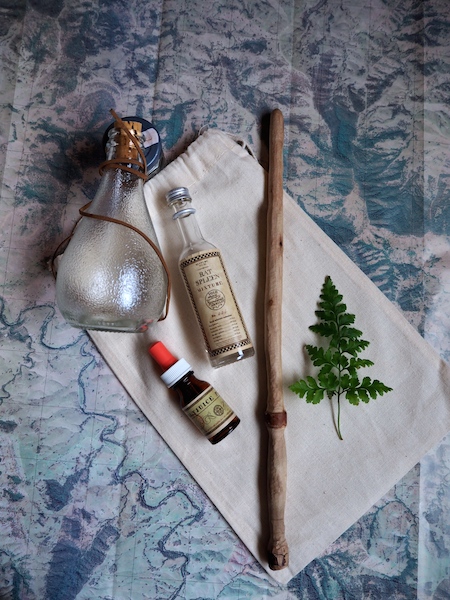
I love to see him draw and cut the shapes and drilling for the ”light blade”. My suggestion of carving each handle and sanding them till it’s cylindrical didn’t have much success…so here it is, raw and already well used:


Light sabre Star wars

Wood work Children

Wooden Light Saber Star Wars

“May the force be with you.” 😉


Harry Potter -Mini Playing Kit-

We do have a few Harry Potter fans here, and spells are flying from every corner of the house. (Shame it doesn’t work though, I will do with a few Quietus! Repairo! or a good Accio! spell to find a lost sock 😉

After reading all the books, we made a little potions kit and my son carved a wand in a Gumtree branch:

Harry potter Kit harry Potter playing kit harry potter wand DIY

Now the children have hours of pretend play ahead!

Little terrarium for little hands

The latest project for those rainy and cold winter days: build a terrarium! Before assembling it, we went to the beach to collect tiny seashells, to the river to collect peebles, a few acorns from the park and some red sand from our hourglass collection. Next time we are heading to the forest, we will collect a bit of moss. Meanwhile, here is the beginning of our tiny garden for fairies, blue wren and ladybug :

terrarium pour enfants

seashell in terrarium

fairy terrarium

blue wren terrarium


Fold, fold & fold

Flextangle

For all the paper lovers, this is a really neat and impressive project to do with children.

We came across a template to build a Flextangle by BabbleDabbleDo. (Follow the link to her website to find the template to print)

And with them, we’ve been practicing our Stop Motion skills with this 12 secondes video:

Pour tous les amoureux du papier, voici une petite activité sympa à faire avec les enfants.

Nous avons trouvĂ© le patron d’un Flextangle sur le site de BabbleDabbleDo. (Suivez le lien vers son site pour imprimer le patron.)

Ensuite nous nous sommes amusés à faire une petite video en Stop Motion de 12 secondes.

Bon weekend pluvieux!

Circus Party -Part 3-

For this last part of the Circus party posts, let’s play with some good old games:

“Le Chamboultou” (with some pompoms and goggle eyes):

chamboule tout

The spy cage:

spy cage

The photo booth (clowning around highly encouraged):

Photo booth

IMG_1363

The Rings of Fire:

Rings of fire

Spinning some crayons on a potter’s wheel: (that was the biggest hit among the little guests!)

Color Spinning

And the Grand Final: Skate Boarding to go thought a bridge of cardboard boxes!…that was really fun!

circus skate
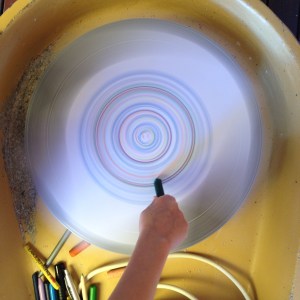
And here is the very tired dad-clown at the end:

IMG_3110

(Note to self: 1/-take a picture of the cake before eating it. 2/-packing away is the easy part – do not complain for messy rooms anymore.)

Enjoy your day, and thanks to Pinterest for a few ideas!

Circus Party -Part2-

Let’s play with a bit of decorations for the party:

Ballons de couleurs

Sign Circus WarningClown cut out

Circus party

Animal Cirus deco

And next week, the lawn games will make the show!

Circus Party -Part1-

You remember that Pirate Party where the children had to catch a real hen to find the tresor?

Well now it is my daughter’s birthday and the theme is going to be fun:

Let’s the greatest show on earth begin!

After spending a bit of time on Pinterest we found cute animal jars to make. After painting the lids and the little plastic animals with acrylic , we just super-glued them together to have those beautiful Mason Jars!

Animal Mason Jars WhiteMason Jars

Mason Jar

 We will use them as Lollybags for the guests.

Mason Jars


Ohlala! toutes ces petites choses….

Aujourd’hui c’est vendredi et on dĂ©monte un appareil photo qui ne fonctionne plus du tout. Alors les mini vis et mini Ă©lĂ©ments en tout genre, il y en plein! Un beau moment plein de curiositĂ©, mais alors quelle galĂšre pour rĂ©pondre aux questions: “qu’est ce que c’est cette piece, maman?” heu… bin heu pfff voyons voir sur Internet… 

Aller faire un tour sur le site de TODD MCLELLAN, c’est beau!

La prochaine fois ce sera au tour du grille pain, ce sera beaucoup plus facile!

demonter un appareil photo

Today is Friday and we are disassembling on old photo camera that doesn’t work anymore. So there was so many-tiny screws and other tiny things! A nice moment of discovery, but such a hard work to answer the question: “What is this maman?” hmm…well…let’s check the Internet.

Go and check the work of TODD MCLELLAN, it is so neat!

Next time it will be the toaster’s turn, much easier!

Old Time Game: The Thaumatrope

Thaumatrope Kangaroo

After reading a book about optical illusions, we made a Thaumatrope with a kangaroo wearing boots and a top hat. And who wants a bit of wikipedia to start the day? 😉

“A Thaumatrope is a toy that was popular in the 19th century. A disk with a picture on each side is attached to two pieces of string. When the strings are twirled quickly between the fingers the two pictures appear to blend into one.”

thaumatrope If you want to make the same one, here is the PDF to print: (you will then need to attach a loop of string (40cm )to each side and twist them before pulling them appart.) Thaumatrope Paris-Bourke <- Click to see PDF I couldn’t make the video go faster to be able to see the illusion on screen, but you will get the idea:

– La cabane amovible – The renter’s cubby house –

We had a few plank of timber in the shed sitting there waiting to be used. So we used the drill, the saw and sanded them to make material for a very special cubby house. You can built it in different shapes and pack it away for easy storage. If you want to make one, don’t use any timber (as us…) the better the material, the better looking and the more solid it will be. But don’t forget it has to be light for the children to build it themselves.

Avec des planches de pin qui traĂźnaient dans le garage, nous avons sciĂ©, percĂ© et poncĂ© pour fabriquer une cabane amovible. Bon si vous souhaitez en faire une, utilisez un bois de qualitĂ© (pas comme nous…) mais n’oubliez pas d’en prendre un lĂ©ger pour que les enfants construisent leur cabane eux-mĂȘmes.
Hand Drilling Hand Drilling Hand Drilling

plank 2


Work in progress:

cabane amovible

Building time:

cabane amovible

cabane amovible cabane amovible runPlay time! Have a good day and a Very Good New Year!

Bonne Année 2015!

-Covering Boxes with fabric-

An easy project to re-use our boxes from our farmer: We just wrapped the lid with fabric just like you would do to cover a book or a gift:

Next time we will try with some paint or wallpaper.

Aussie Farmer boxes

IMG_2167


On your marks, set paper ball, fire!

rubber band canon

La dĂ©couverte du site internet -Royal Institution- nous inspire tellement sur les activitĂ©s du moment, qu’il faut absolument qu’on partage ce lien: http://rigb.org/experimental/rubber-band-cannons

Nous avons fabriqué des cannons à élastiques trÚs simple et parfait pour jouer au chamboule-tout.

We just discovered a great website from the Royal Institution of Great Britain. We’ve made their Rubber band cannons and had so much fun. Here is the link: http://rigb.org/experimental/rubber-band-cannons

OLYMPUS DIGITAL CAMERA


-Puzzle Magnet-

Un petit project facile Ă  faire avec les enfants: mettre des aimants derriere des puzzles, des cartes ou des lettres en bois. (il faut juste trouver des feuilles d’aimant souples et adhĂ©sives)

An easy project to do with the children: glue magnets behind puzzles or wooden letters.

Magnet making

Wooden Magnet

Magnet

Magnet


De quoi dĂ©corer (ou cacher) le rĂ©frigĂ©rateur…

Good to decorate (or hide) the fridge…;-)

Like Magic!

IMG_0644

In our house, when you lose a baby tooth, the tiny french mouse (or tooth fairy) comes and a little crystal is left behind. Now that the collection is growing quite quickly, we decided to ”build”our own crystals! (thanks to my friend and the website Scope for the idea.)

Chez nous, quand la petite souris passe, elle laisse derriĂšre elle une petite pierre semi-precieuse. Maintenant que la collection est dĂ©jĂ  bien grande, nous avons dĂ©cidĂ© de “fabriquer” nos propres cristaux! (Merci Ă  mon amie et au site web Scope pour la bonne idĂ©e.)

You will need: Hot Water, Borax, Pipe Cleaners, 1 plastic container, 1 wooden spoon and some string. (and 24h of patience.)

Vous avez besoin de: Borax, Eau chaude, 1 pot en plastique, 1 cuillĂšre en bois et de la ficelle.(et 24h de patience.)

IMG_0997

-Une tasse d’eau pour 3 cuillĂšres Ă  soupe de Borax-

-One cup of water for 3 large spoons of Borax-

IMG_1001Laisser suspendre les formes de chenille dans la solution et attendre le lendemain.

Let the pipe cleaner hang in the liquid and wait for tomorrow.

IMG_1036 IMG_1037 IMG_1038Et voilĂ !

Tadaam!

%d bloggers like this: